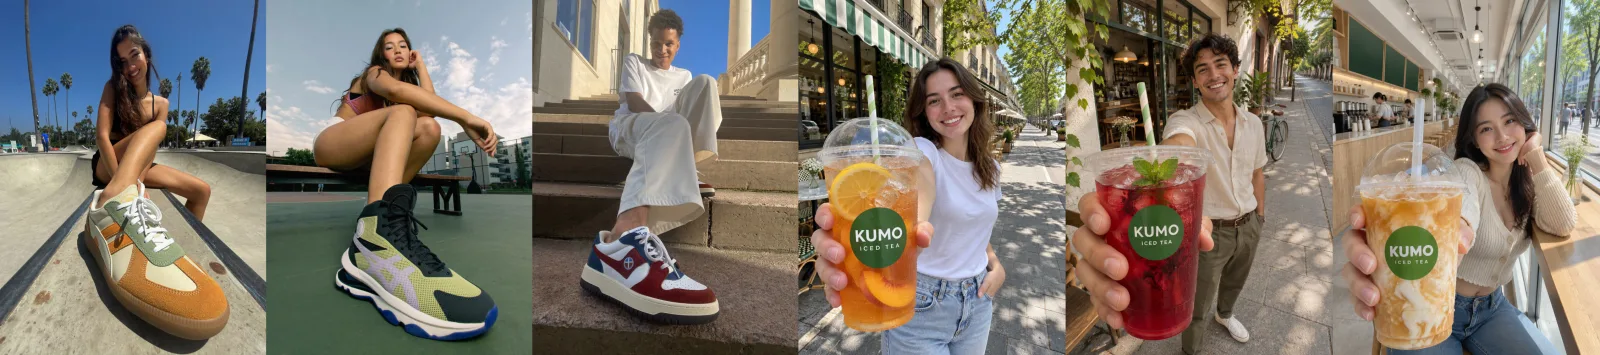
I spent a day working out how to make a product come out of its photo when you move the mouse, with Claude Code and Higgsfield and no design experience. Here's how, step by step: what I asked for, what went wrong and how I fixed it.
Claude Code
Higgsfield
GPT Image 2.6
Depth Anything
Lenis
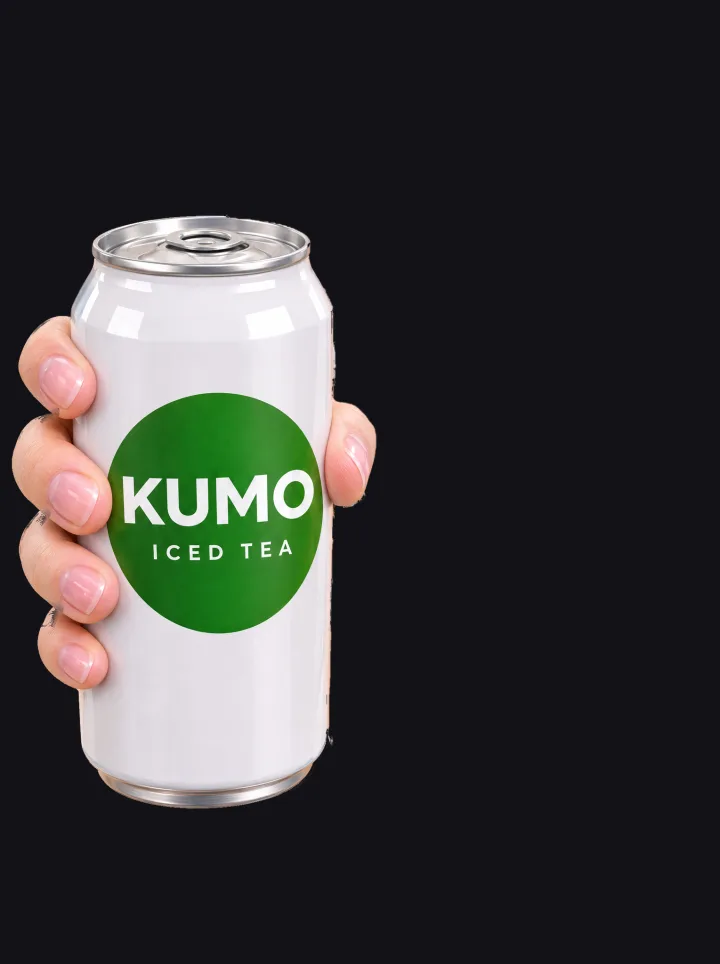
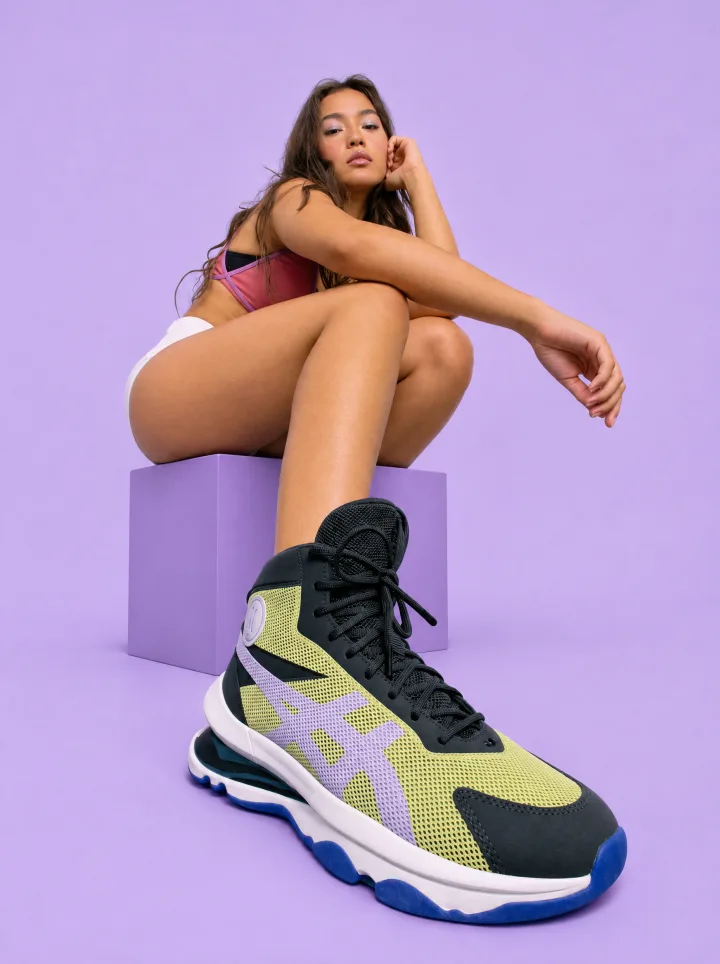
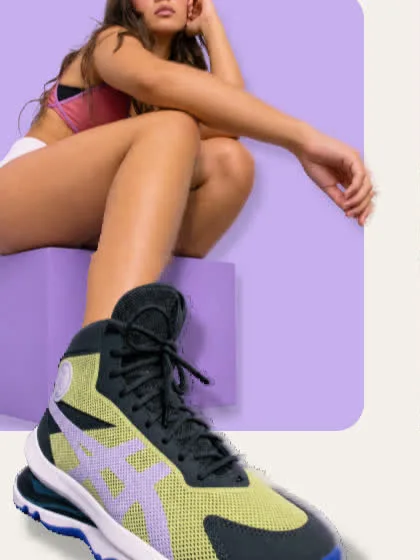
The two finished pages, Kumo and Halfcourt, with the mouse moving over them.
The idea
Move the mouse over the photo and the product comes towards you. The can, or the shoe, slides out of the picture and over the page, while the girl holding it barely moves. It looks 3D, but it's one photo.
I'd seen someone do it with a product, a Coke can, and I wanted to work out how.
It comes down to three things:
A photo with the product held out at the camera. Made with GPT Image 2.6 on Higgsfield.
A depth map. A black and white copy of the photo that says how far everything is from the camera. Made with Depth Anything, free, on your own laptop.
Two layers. The photo cut into the person and the product. Under the mouse each one moves by its depth, so the product moves about three times as far as she does.
Claude Code does the work in between: it writes the prompts, makes the pictures through Higgsfield, runs the depth model, cuts the layers out and builds the page. I talked to it the whole way, and it built what I described.
Kumo and Halfcourt are made up, and so are their products and every word on their pages. They're there to show what's possible.
What you need
Claude Code. Everything happens here.
A Higgsfield account, connected to Claude Code. You'll use GPT Image 2.6 for the photos (it prints a logo cleanly), the background remover to cut them out, and Nano Banana 2.1 to paint in what the product was hiding. Connect it once, and Claude can use them for you. In a terminal:
claude mcp add --transport http higgsfield https://mcp.higgsfield.ai/mcp
Then type /mcp in Claude Code and log in to Higgsfield. (On claude.ai you can add it as a custom connector with the same address instead.)
Depth Anything V2. Free. Claude installs it and runs it on your laptop. Use the Small one: it's the one you're allowed to use for commercial work.
Lenis (free, on GitHub). Smooth scrolling for the page at the end.
01
The photo
Find a shot with depth
The effect only works if the product is much nearer the camera than the person. So ask for someone holding it out at the lens (or, for a shoe, a leg stretched towards it): the product big and sharp in front, the person a step behind. Make it portrait. And show a shoe from the side, not the sole, or it looks like you're showing off the grip.
Round four: court shoes and iced teas. It took about 35 pictures over seven rounds to get the two I used.
My first photos were on the street. In step 03 I reshoot them on a plain backdrop, for reasons you'll see. If you're following along, you can go straight to that.
A test page first
Before building any real website, I had Claude build me a prototyping studio: a page with just the effect on it, buttons to switch between my photos and a slider for the strength. So I could try it and see whether it was any good.
The test page: pick a photo, move the mouse, change the strength.02
The depth map
How far away every pixel is
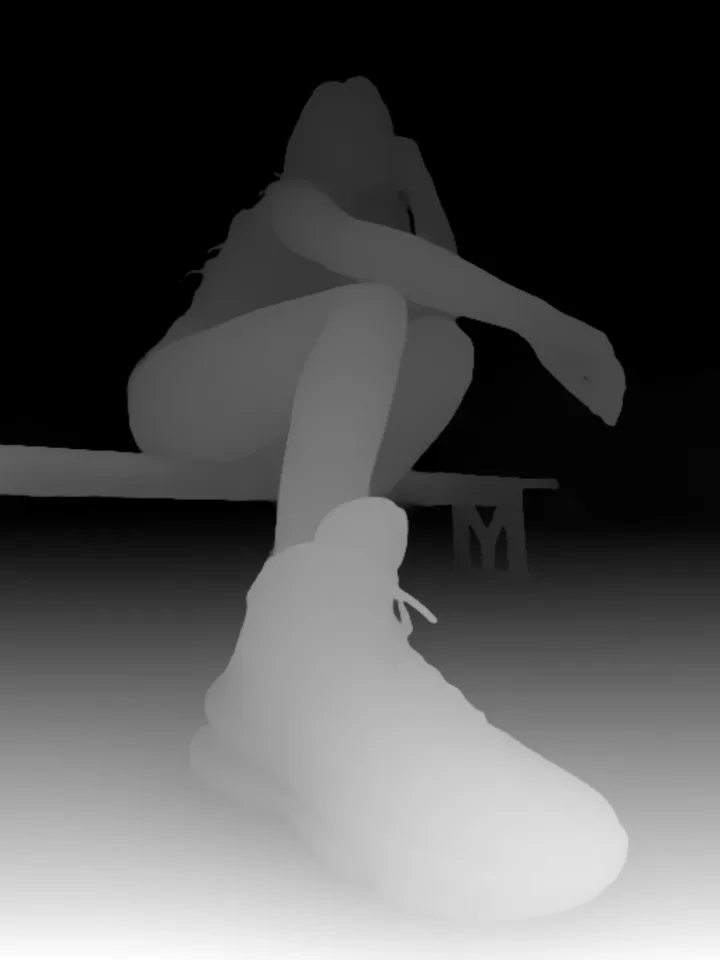
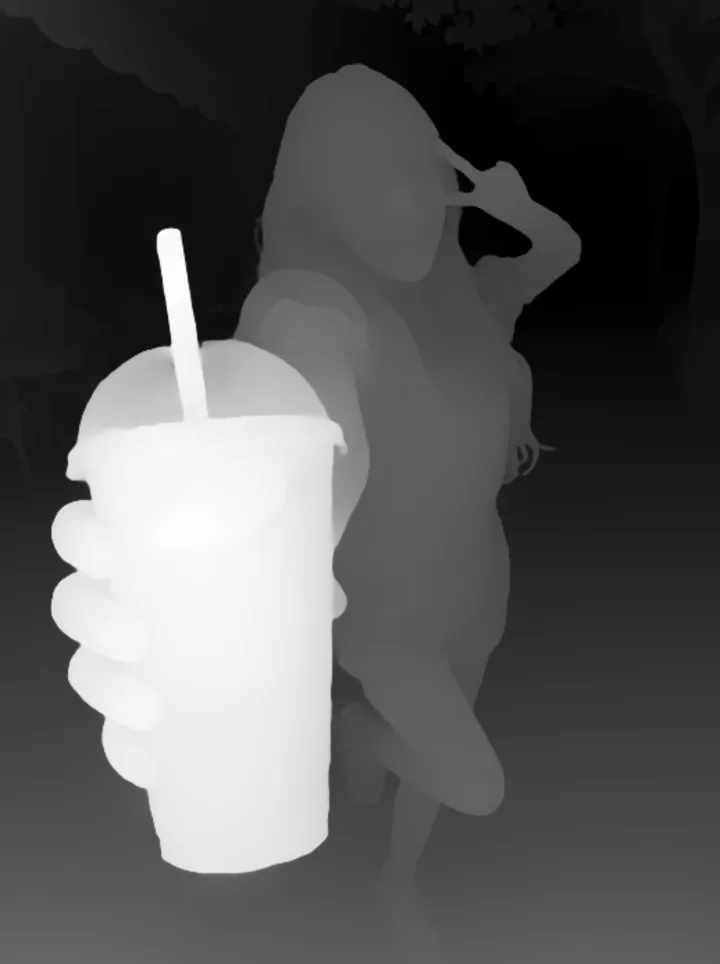
A depth map is a black and white copy of your photo. White is near the camera, black is far. Depth Anything makes one in a few seconds, on your laptop, for free.
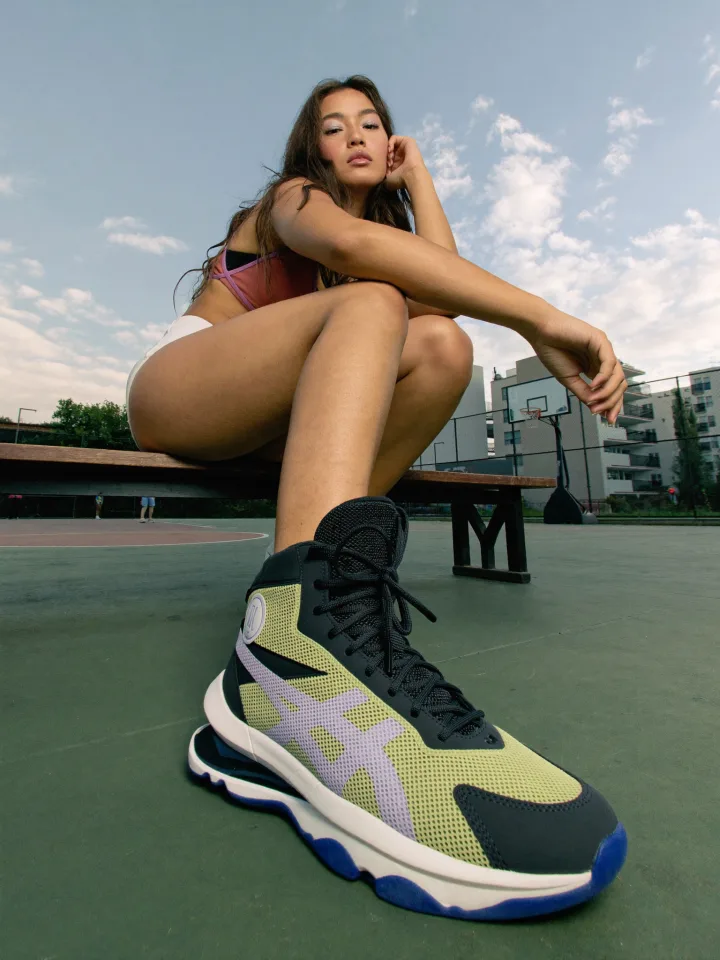
The photo
Its depth map
The photo
Its depth map
The shoe and the cup come out almost white: they're the nearest things in the picture.
First try: bend the photo
With the map, the first try was simple. Under the mouse, every pixel slides by its own depth. My first version had it the wrong way round: the background swung about and the shoe barely moved. That's fine for moving the background a little, but I wanted the opposite. The thing at the front should move the most.
Wrong way round
Flipped
Wrong way round, the background swings and the shoe barely moves. Flipped, the shoe moves the most.
The smear
As soon as the front moved more, it fell apart. When the cup slides, there's nothing behind it in the photo, so the page stretches whatever is next to it. The street smeared, and her hand stretched like dough.
Moving
Far left
Far right
Far left, her arm stretches. Far right, the street smears behind the cup. Good enough for a background that moves a little, but not for a product that's meant to come out of the picture.03
Two layers
Cut it into her and the product
The fix: stop moving every pixel on its own. Cut the photo into two pieces, her and the product, and move each one as a whole. Nothing stretches, because nothing is bent.
Higgsfield's background remover cuts them out. Then Nano Banana 2.1 paints in the part of her the can was hiding, so when the can moves, there's something behind it.
Her
The can
Apart
Two layers, each at its own depth.
Put her in a square, and let the product out
Then the idea that made it work: take the background away completely. She stands in a square of solid colour, and the product comes out over the square's edge, onto the page. It's almost like it's reaching out of its own picture.
Mouse to the left
Mouse to the right
Still the street photo here, on the test page. The square hides the street, so there's nothing left to smear.
Then I reshot both photos on a plain backdrop, the same colour as the square. Any edge the cut-out leaves behind is the square's own colour, so you never see it.
Hide the arm
The arm was the last problem. It joins her to the can, and a join between two layers tears when they move apart. The easiest fix, honestly: have her hold the can straight at the camera, so the can hides her arm.
Arm showing
Arm hidden
The shoe
Held out to the side, you see her arm. Straight at the camera, the can hides it. The shoe was reshot the same way, on lilac: each backdrop is the colour of its page's square.
Bend the leg at the knee
A shoe on someone's foot can't slide on its own: the leg would snap at the ankle. So her lower leg swings from the knee instead, stiffly, like a real leg, and the knee moves with her. Nothing glitches.
Move each one by its depth
The depth map is still what makes it work, because it tells you how far each layer should move. Claude reads one number for each layer from the map: on Kumo the can is 0.94 and she's 0.27. So the can moves about three times as far as she does, and it really pops out.
Turns at the knee
Near moves more
The shoe's shin turns about the knee. The can moves about three times as far as she does.
Look closely at the far left and right
Move the mouse all the way to each side and look. That's where the small faults show: her ankle looked like it broke, there was a ghost streak behind the can, the edges of her hair glowed orange, and there was a hole in her thumb. Point at each one and Claude fixes it.
The ankle
A ghost streak
04
The page
Build the real page
Once the effect's right, get Claude to build the real page in your design, with the product and the effect at the top, and some cool stuff around it.
On Kumo, when you scroll, the screen holds and everything pushes in on the can's logo until its green fills the screen. On Halfcourt, the word HALFCOURT parts to the sides and the shoe comes at you. Both scroll on Lenis, so it's smooth.
Kumo: the push into the can's logo.Halfcourt: the word parts and the shoe comes at you.
On a phone there's no mouse, so it just sways on its own.
Before you start
Shoot for depth. The product right at the lens, the person a step behind. Portrait.
Shoot on a plain backdrop the colour of your square, so a leftover edge disappears.
Hide the joins. The product straight at the camera hides the arm. A shoe swings from the knee.
Don't bend the photo. Cut it into layers, and use the depth map for how far each one moves.
Test it on its own page first, mouse all the way left and right, before you build the site.
That's it. If you have no design experience, that's fine: I didn't either. Describe what you want, look at what comes back, and keep going.